Shape keys allow for non-destructive mesh deformation, enabling smooth animations and morph targets without increasing poly count. They won't be necessary unless explicitly required.
Creating a Shape Key
Select Your Mesh: Choose the object that requires a shape key.
Navigate to the Object Data Tab: In the Properties panel, go to the Object Data Properties (green triangle icon).
Add a Shape Key: Under the Shape Keys section, click the + button. This creates the Basis key (default shape). Click + again to create a new shape key, which will store the edited version of the mesh.
Rename the Shape Key: Naming is crucial. Use clear, descriptive names that reflect the intended transformation, such as:
Lid_OpenButton_PressedHandle_RotatedCushion_Deformed
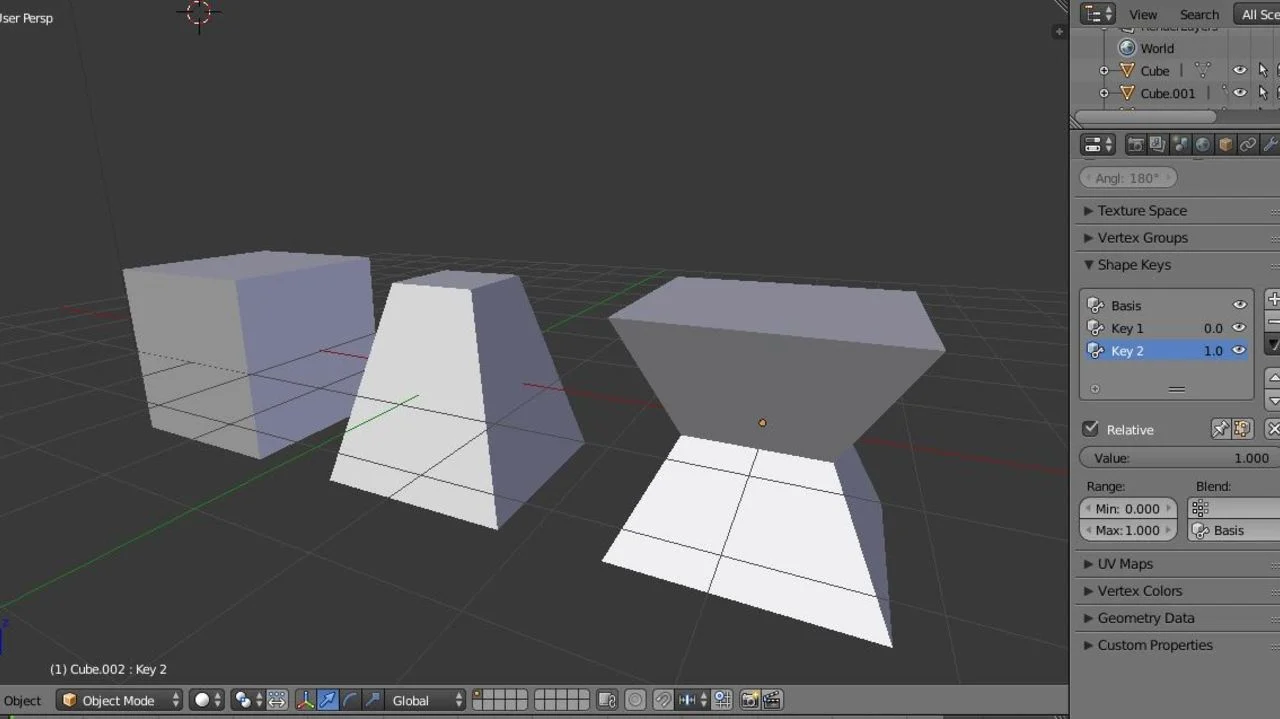
Example: Shape keys in the data tab (Blender)
Editing a Shape Key
Select the Shape Key: Ensure the new shape key (not the Basis) is active.
Enter Edit Mode: Press Tab or switch to Edit Mode.
Modify the Mesh: Move, scale, rotate or adjust vertices to create the desired deformation.
Exit Edit Mode: Press Tab to return to Object Mode. The transformation is stored in the selected shape key.
Test the Shape Key: Adjust the Value slider under the Shape Keys section (ranges from 0 to 1) to preview the effect.
Shape Keys and GLB Export
Once shape keys are added and properly named, they will be included in the exported GLB file.
Ensure all transformations are applied (Ctrl + A > Apply All Transforms).
Check that shape keys function correctly before exporting.
Use File > Export > glTF 2.0 (.glb) and ensure Shape Keys are enabled in the export settings.
